During week 7, we delved into an exciting array of subjects within the world of microcontrollers. First, we learned how to operate a Servo Motor, and manipulate programs within microcontrollers such as an ESP32 to control these motors. Then, we dove deeper into the many different output devices that were available within the lab. For instance we learned how to operate RGB/LED strips, and manipulate the color within these individual channel. We also looked into the use of OLED/TFT displays, and changing programs to display different things on the screens.
Assignment: To create a circuit that integrates at least one input device and one output device.
1. Arduino-Based Musical Circuit w/ Piezo Buzzer
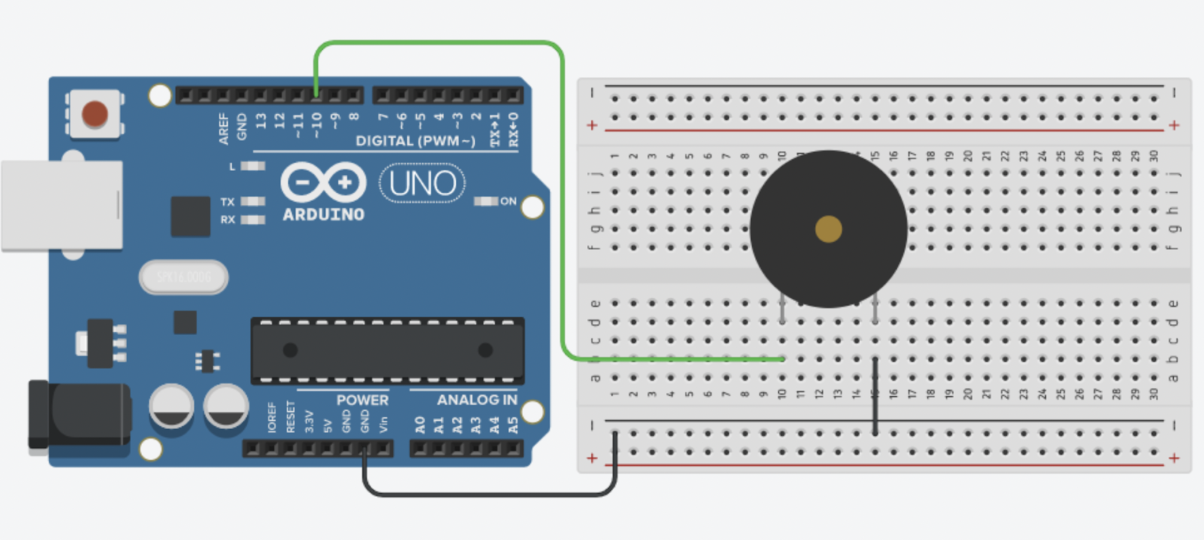
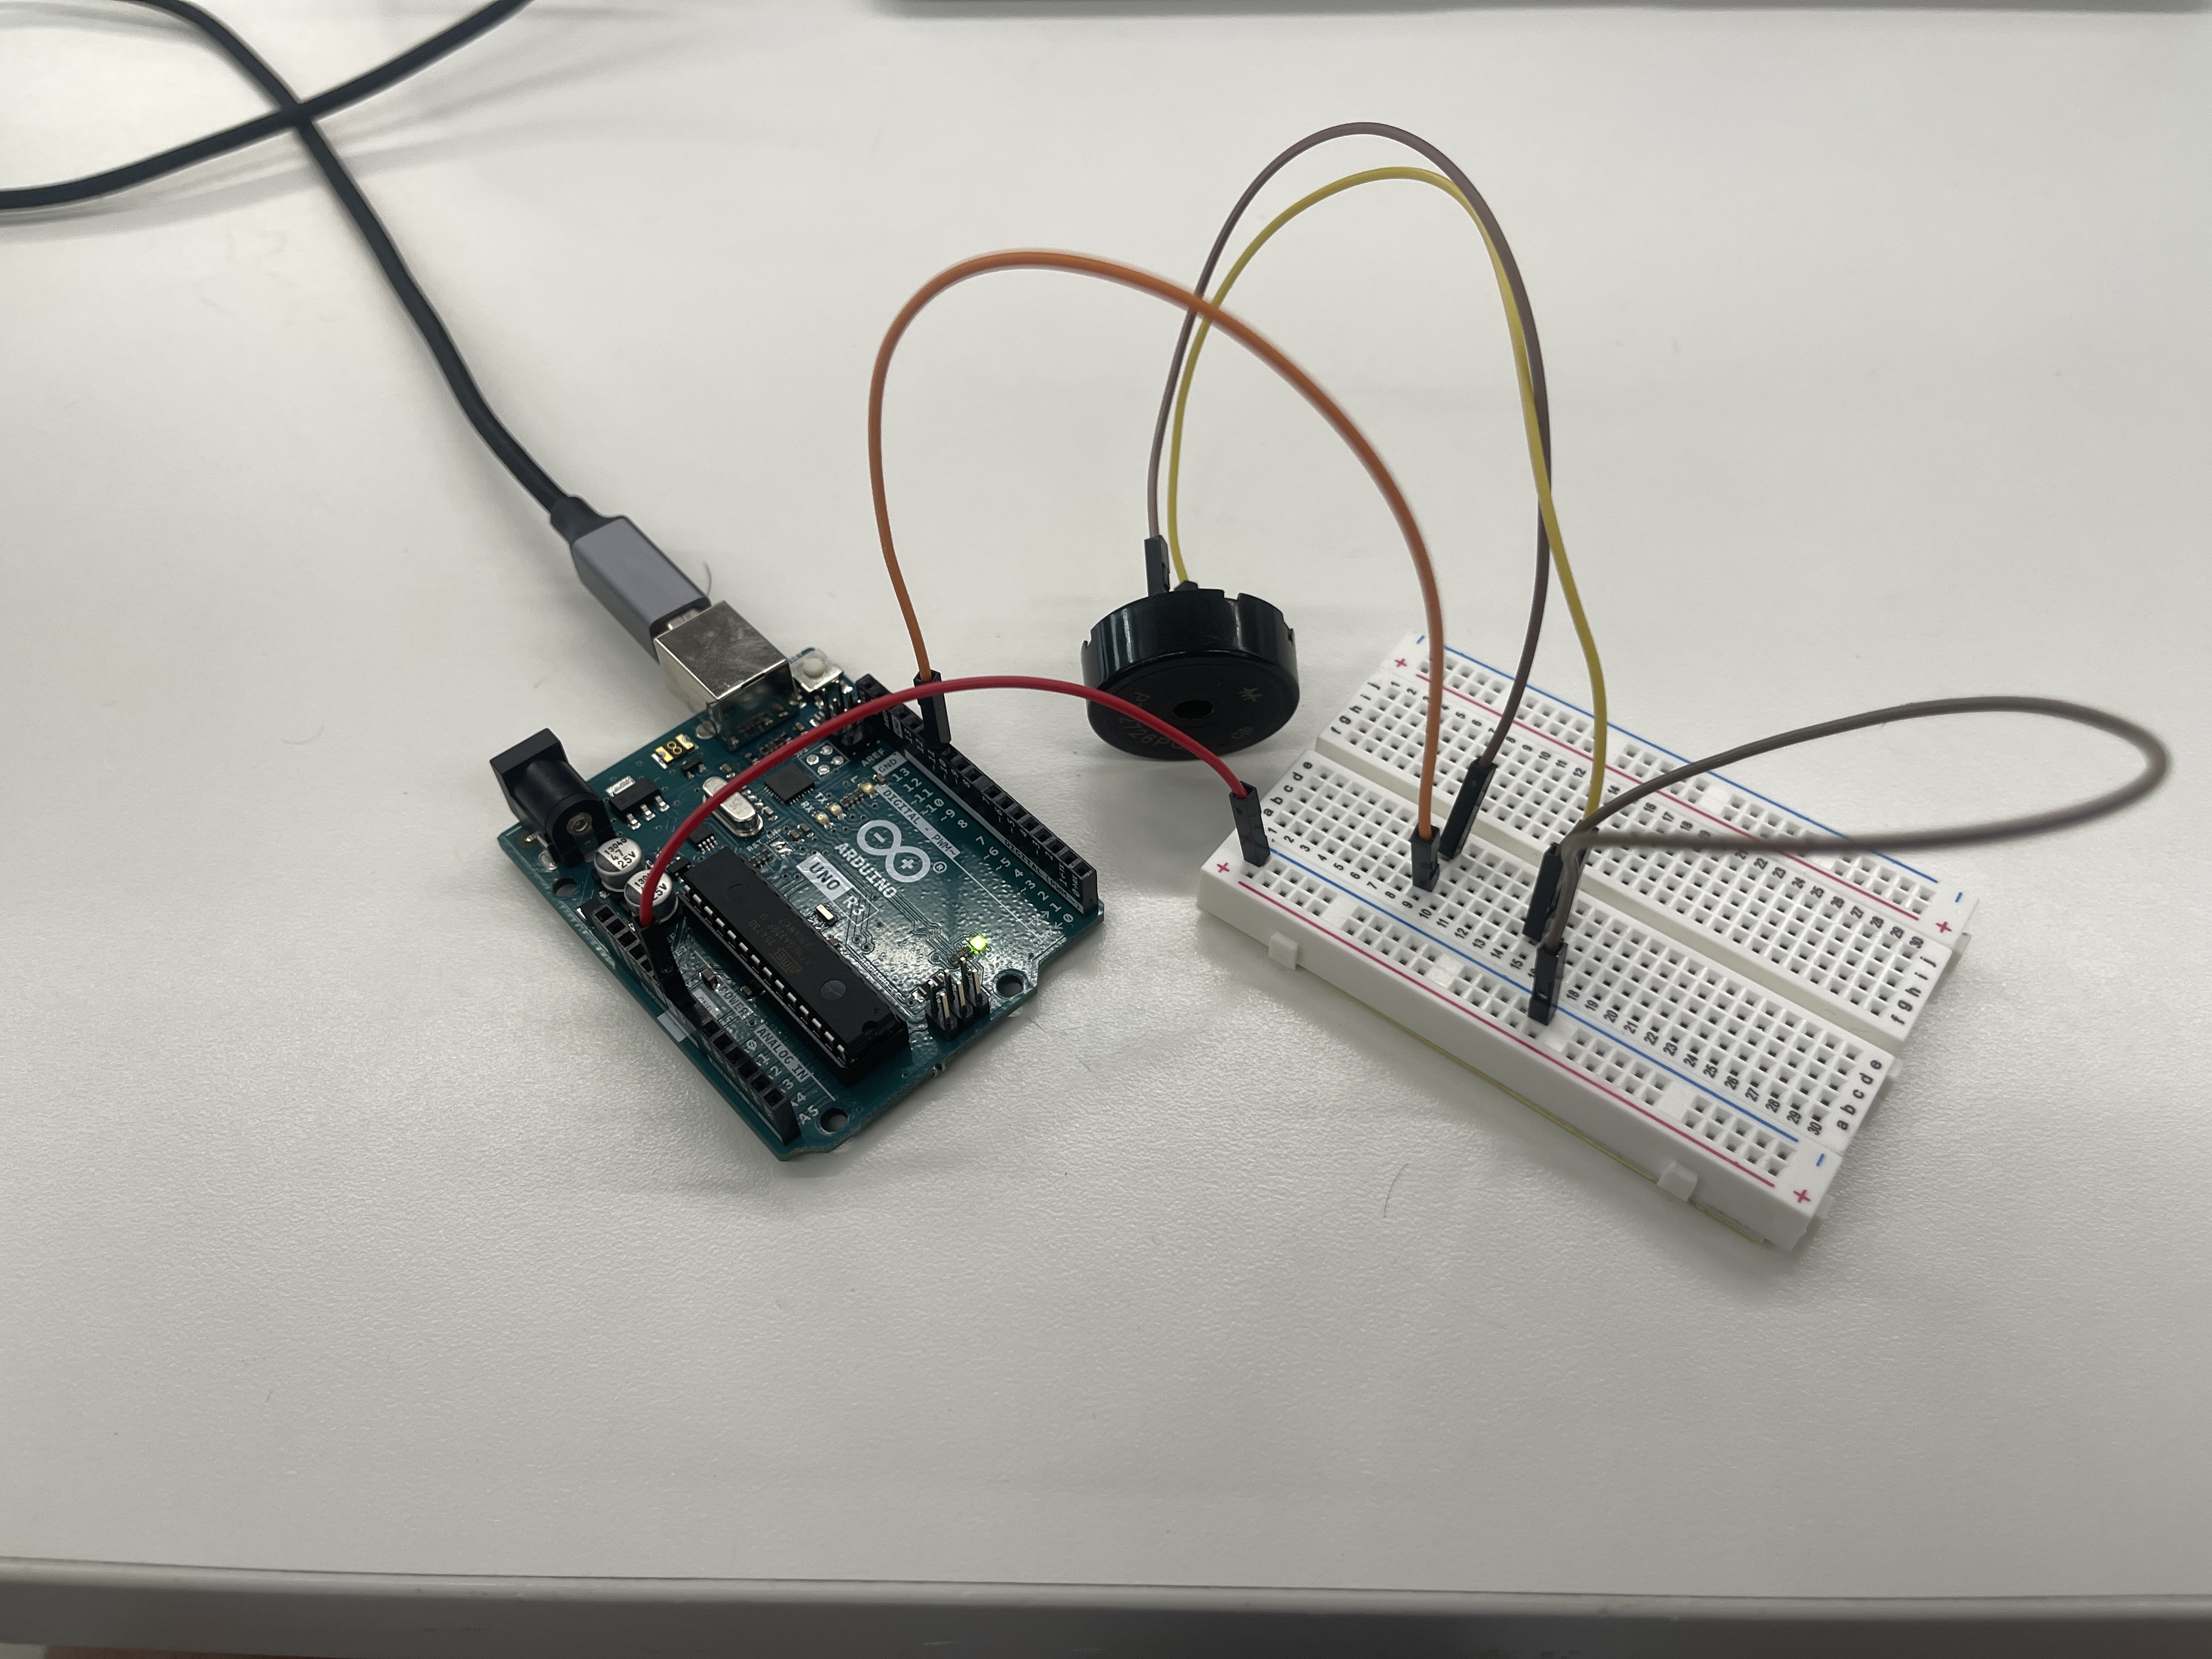
Out of all of the output devices that we could choose from, I found the Piezo Buzzer the most interesting. Therefore, I attempted to create a circuit that used a program within an Arduino to play a song on a Piezo Buzzer. Below are two pictures: one of a circuit model that I followed to setup the Piezo Buzzer. Another picture shows how I implemented this circuit model onto a real Arduino.
Program Implementation
After having successfully assembled the circuit, the next step was to incorporate a program into the circuit. In pursuit of a fitting piece of music to play through the Piezo Buzzer, I found an online program that was coded to play the Game of Thrones theme song.
Here is the code that I implemented into the Arduino Uno:
          /*
            Game of Thrones
            Connect a piezo buzzer or speaker to pin 11 or select a new pin.
            More songs available at https://github.com/robsoncouto/arduino-songs

            Robson Couto, 2019
          */
          #define NOTE_B0  31
          #define NOTE_C1  33
          #define NOTE_CS1 35
          #define NOTE_D1  37
          #define NOTE_DS1 39
          // ... (omitted for brevity)
          #define NOTE_G7  3136
          #define NOTE_GS7 3322
          #define NOTE_A7  3520
          #define NOTE_AS7 3729
          #define NOTE_B7  3951
          #define NOTE_C8  4186
          #define NOTE_CS8 4435
          #define NOTE_D8  4699
          #define NOTE_DS8 4978
          #define REST      0

          // change this to make the song slower or faster
          int tempo = 85;

          // change this to whichever pin you want to use
          int buzzer = 11;

          // notes of the melody followed by the duration.
          // a 4 means a quarter note, 8 an eighth , 16 sixteenth, so on
          // !!negative numbers are used to represent dotted notes,
          // so -4 means a dotted quarter note, that is, a quarter plus an eighteenth!!
          int melody[] = {
            // Game of Thrones
            // Score available at https://musescore.com/user/8407786/scores/2156716

            // ... (omitted for brevity)

            REST,4, NOTE_GS5,16, NOTE_AS5,16, NOTE_C6,8, NOTE_G5,8, NOTE_GS5,16, NOTE_AS5,16,
            NOTE_C6,8, NOTE_G5,16, NOTE_GS5,16, NOTE_AS5,16, NOTE_C6,8, NOTE_G5,8, NOTE_GS5,16, NOTE_AS5,16,
          };

          // sizeof gives the number of bytes, each int value is composed of two bytes (16 bits)
          // there are two values per note (pitch and duration), so for each note there are four bytes
          int notes = sizeof(melody) / sizeof(melody[0]) / 2;

          // this calculates the duration of a whole note in ms
          int wholenote = (60000 * 4) / tempo;

          int divider = 0, noteDuration = 0;

          void setup() {
            // iterate over the notes of the melody.
            // Remember, the array is twice the number of notes (notes + durations)
            for (int thisNote = 0; thisNote < notes * 2; thisNote = thisNote + 2) {

              // calculates the duration of each note
              divider = melody[thisNote + 1];
              if (divider > 0) {
                // regular note, just proceed
                noteDuration = (wholenote) / divider;
              } else if (divider < 0) {
                // dotted notes are represented with negative durations!!
                noteDuration = (wholenote) / abs(divider);
                noteDuration *= 1.5; // increases the duration in half for dotted notes
              }

              // we only play the note for 90% of the duration, leaving 10% as a pause
              tone(buzzer, melody[thisNote], noteDuration * 0.9);

              // Wait for the specified duration before playing the next note.
              delay(noteDuration);

              // stop the waveform generation before the next note.
              noTone(buzzer);
            }
          }

          void loop() {
            // no need to repeat the melody.
          }
Below is a video of the Piezo Buzzer working:
Adding an Input Device
After successfully creating the circuit, I wanted to add an input device, which would control whether if the sound from the Piezo Buzzer was going to be played or not. Thus, I changed the circuit and made sure that the current had to go through a button in order to reach the output device. Furthermore, I wanted to experiment with a different device, so instead of a Piezo Buzzer, I soldered the end of a wire to a speaker. Then, I replaced the Piezo Buzzer in the circuit with this speaker.
Here is a video of the setup after the new configuration: