During this week of class, we learned how to navigate different network devices, and aspects of wireless communication to learn how to remotely control microcontrollers. For instance, we dove deeper into the ESP32 microcontrollers, understanding its different capabiilites and functionalities, while also understanding it's application in wireless data transmission.
1. Wireless Remote LED Control with ESP32 and Google Firebase
Within this class assignment, I worked with a classmate (Ali Cicek) to create a circuit which consisted of a lightbulb that could be remotely switched on and off through the use of our computers via WIFI connection.
A) Setting up Google Firebase
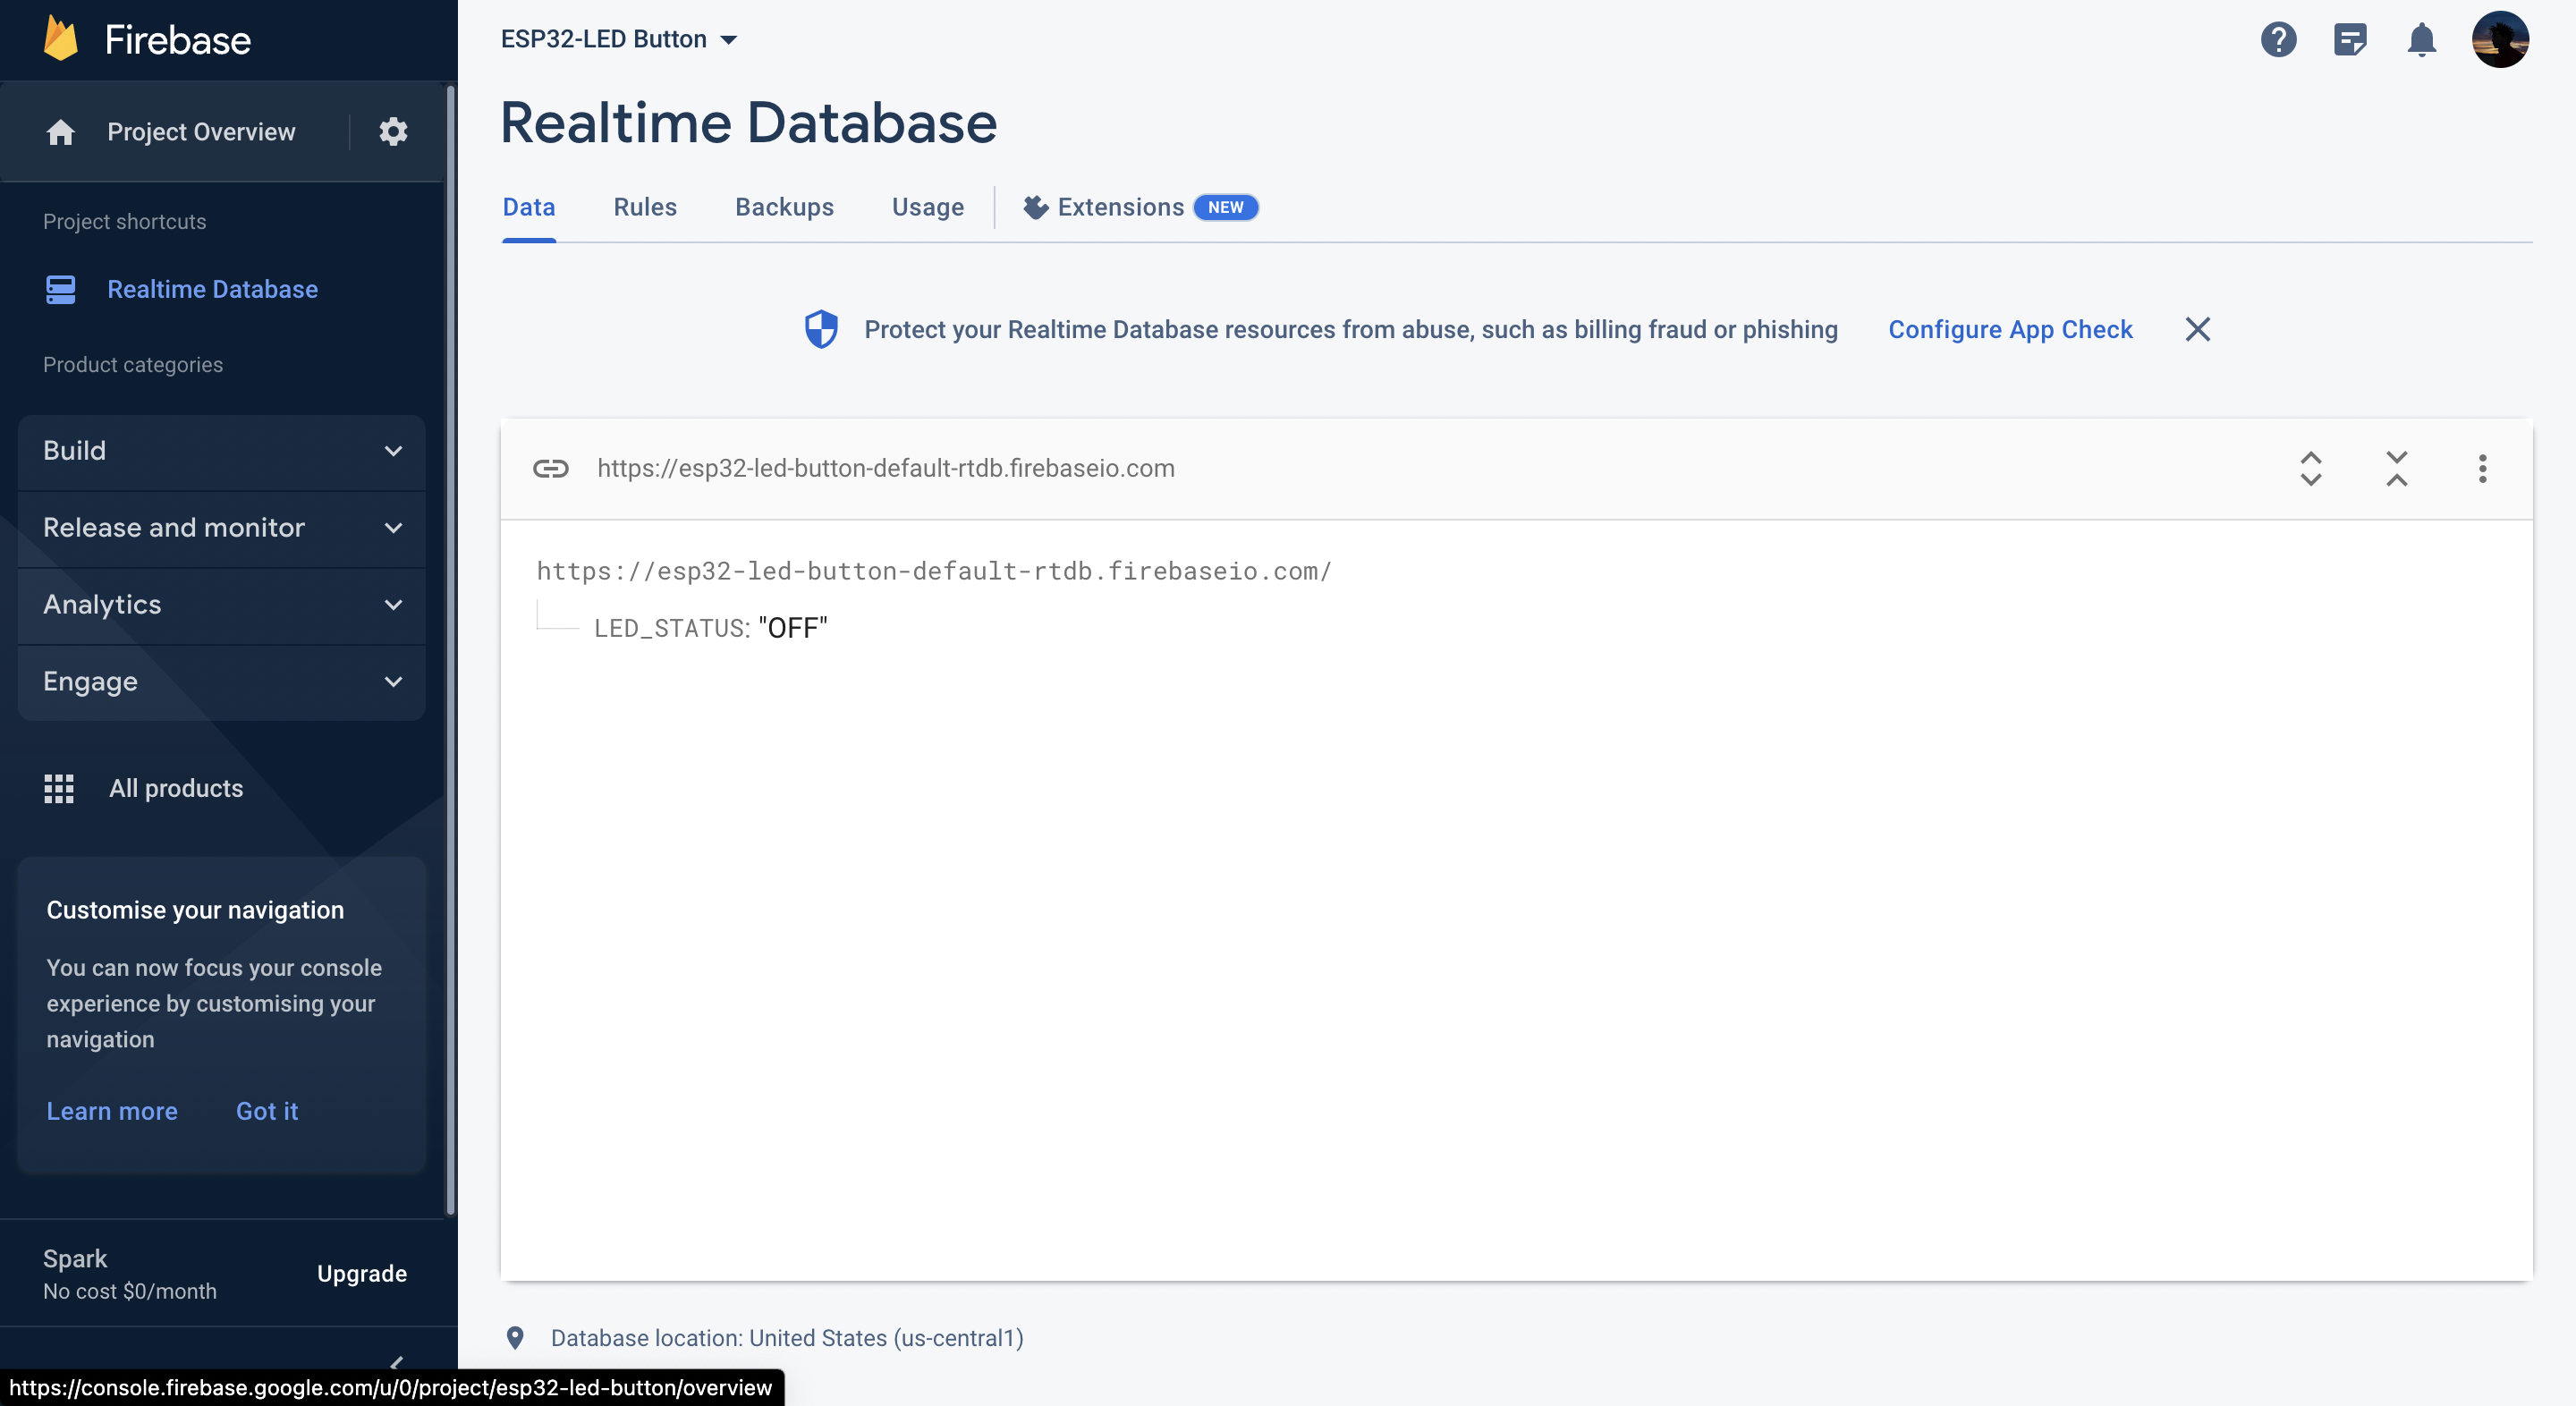
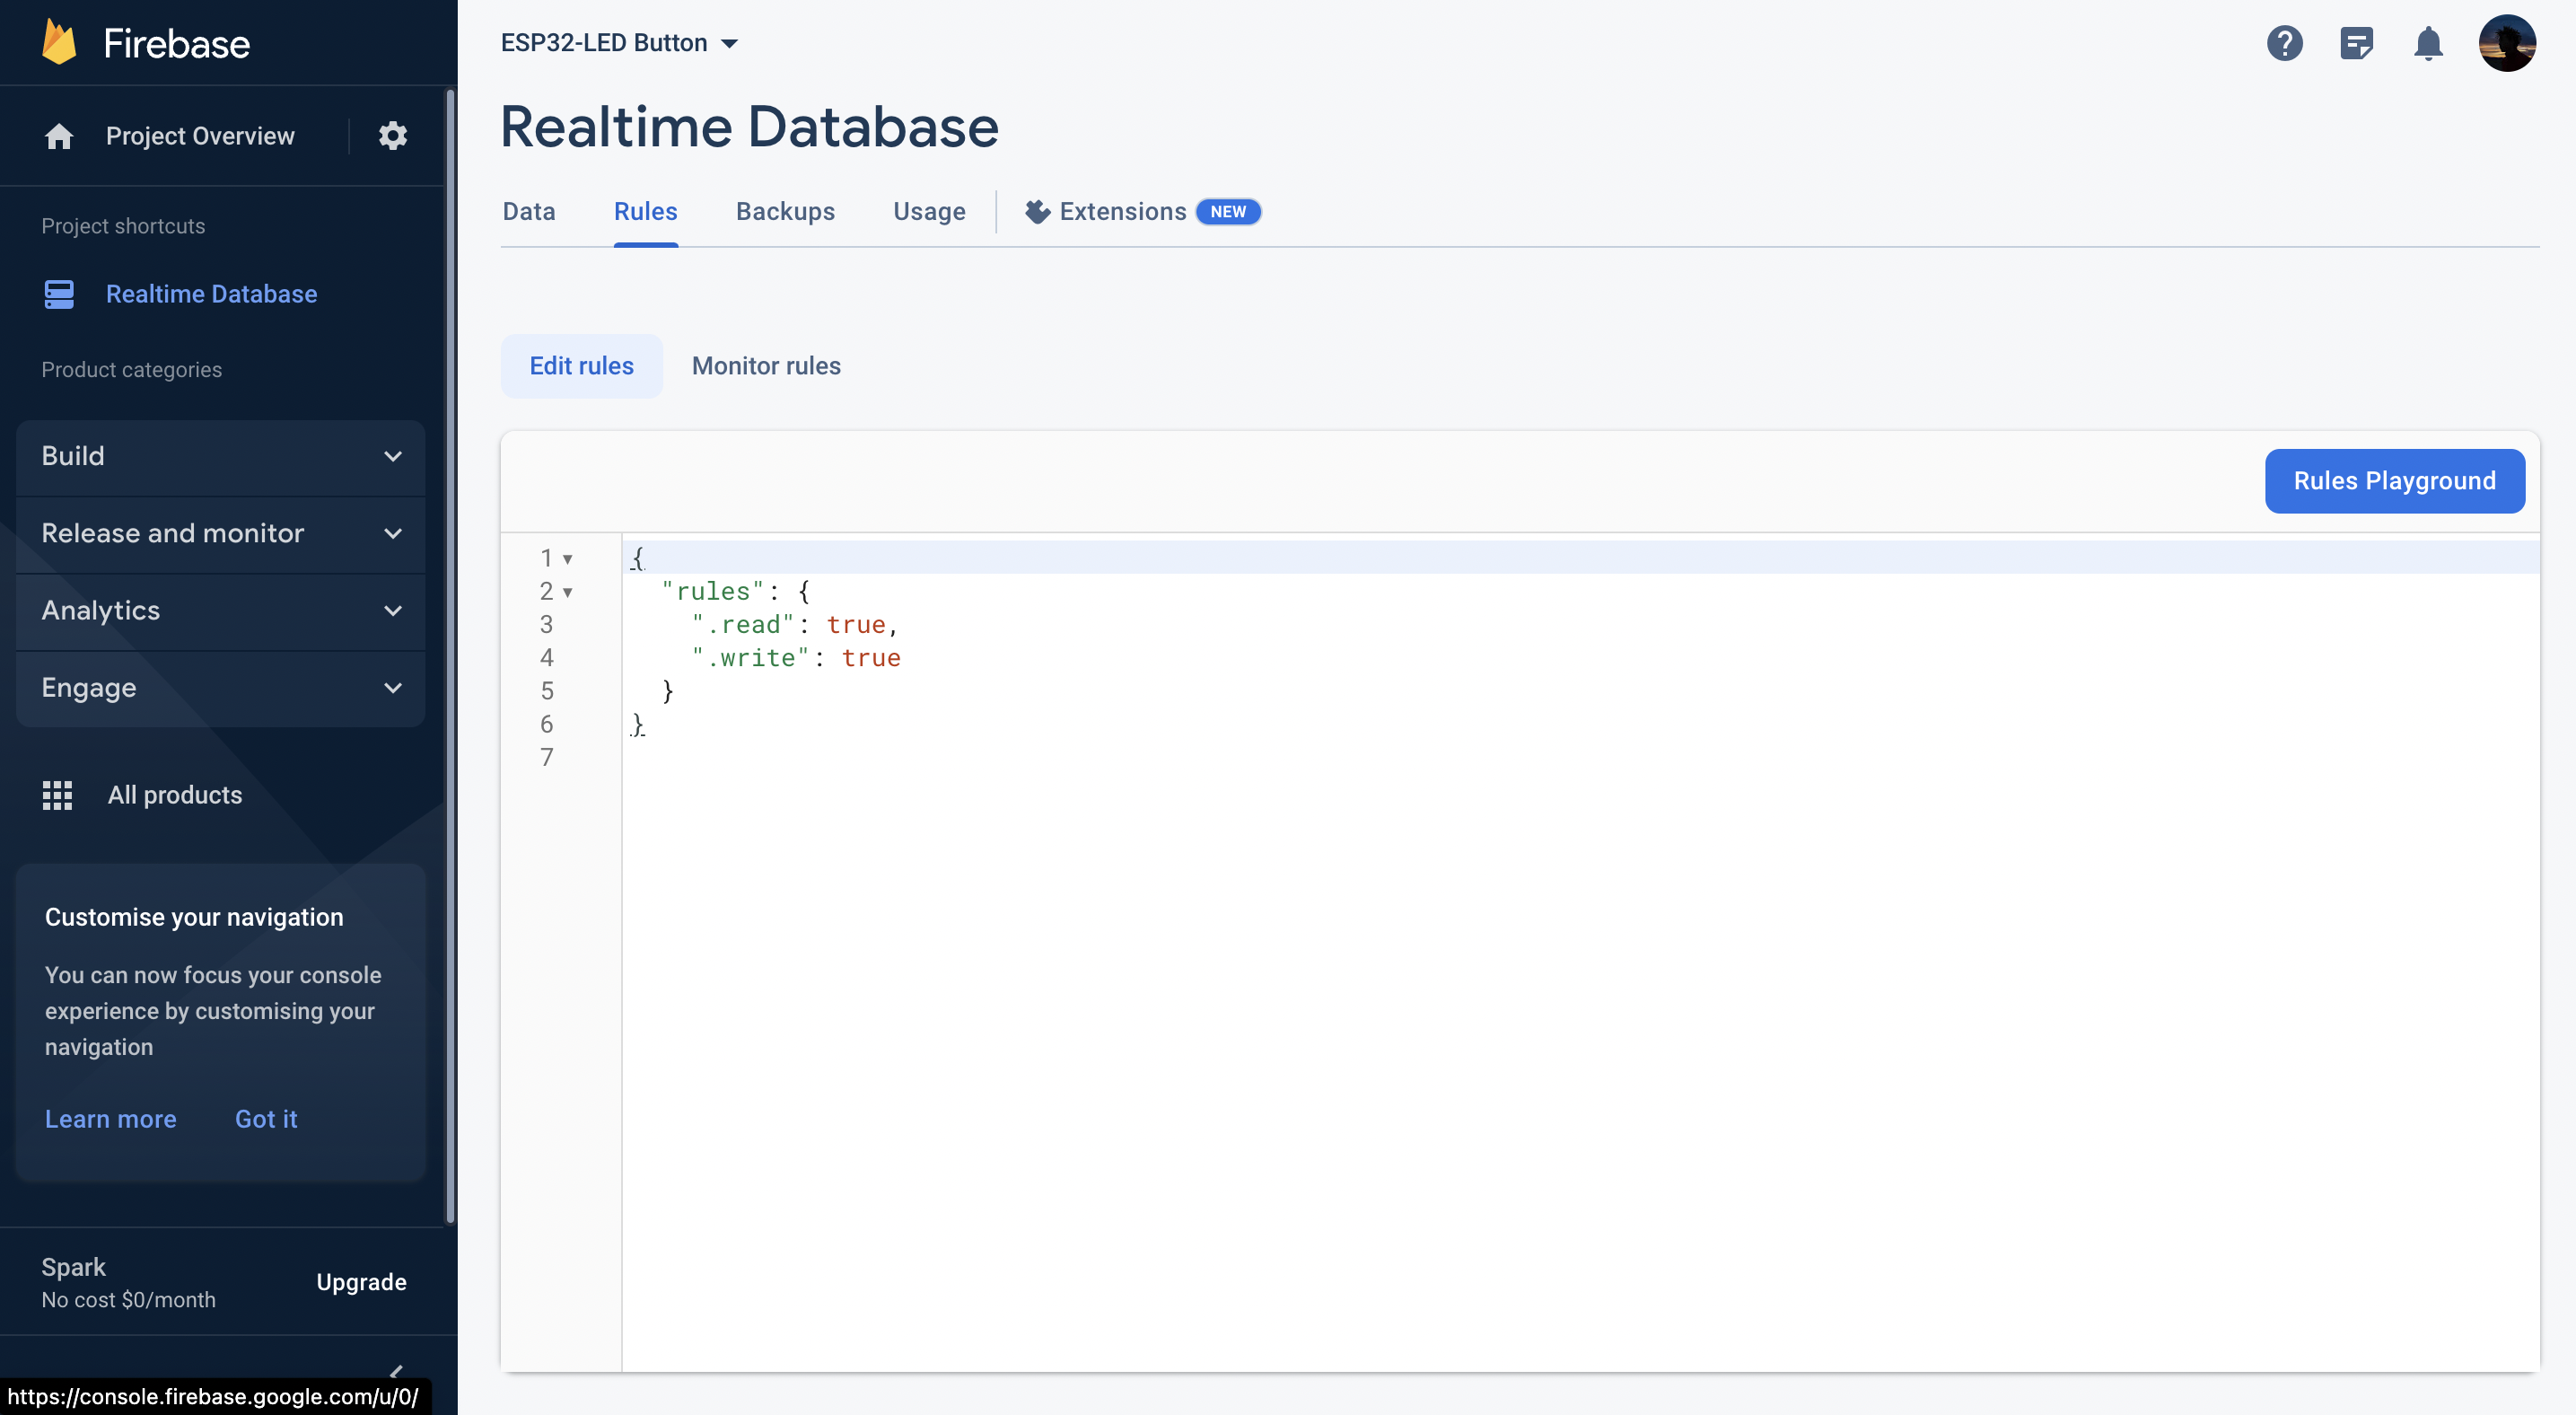
Our first step of this assignment was to create a WIFI server through Google Firebase, which is essentially a 3rd party platform that acts as an interactable database. To set up Google Firebase for the project, we created a new Firebase project and specified a project name, which generated a unique URL for our database access. We then opted for "Realtime Database" and created the database with appropriate security rules. We set both read and write permissions to "true" to allow access for our ESP32 board.
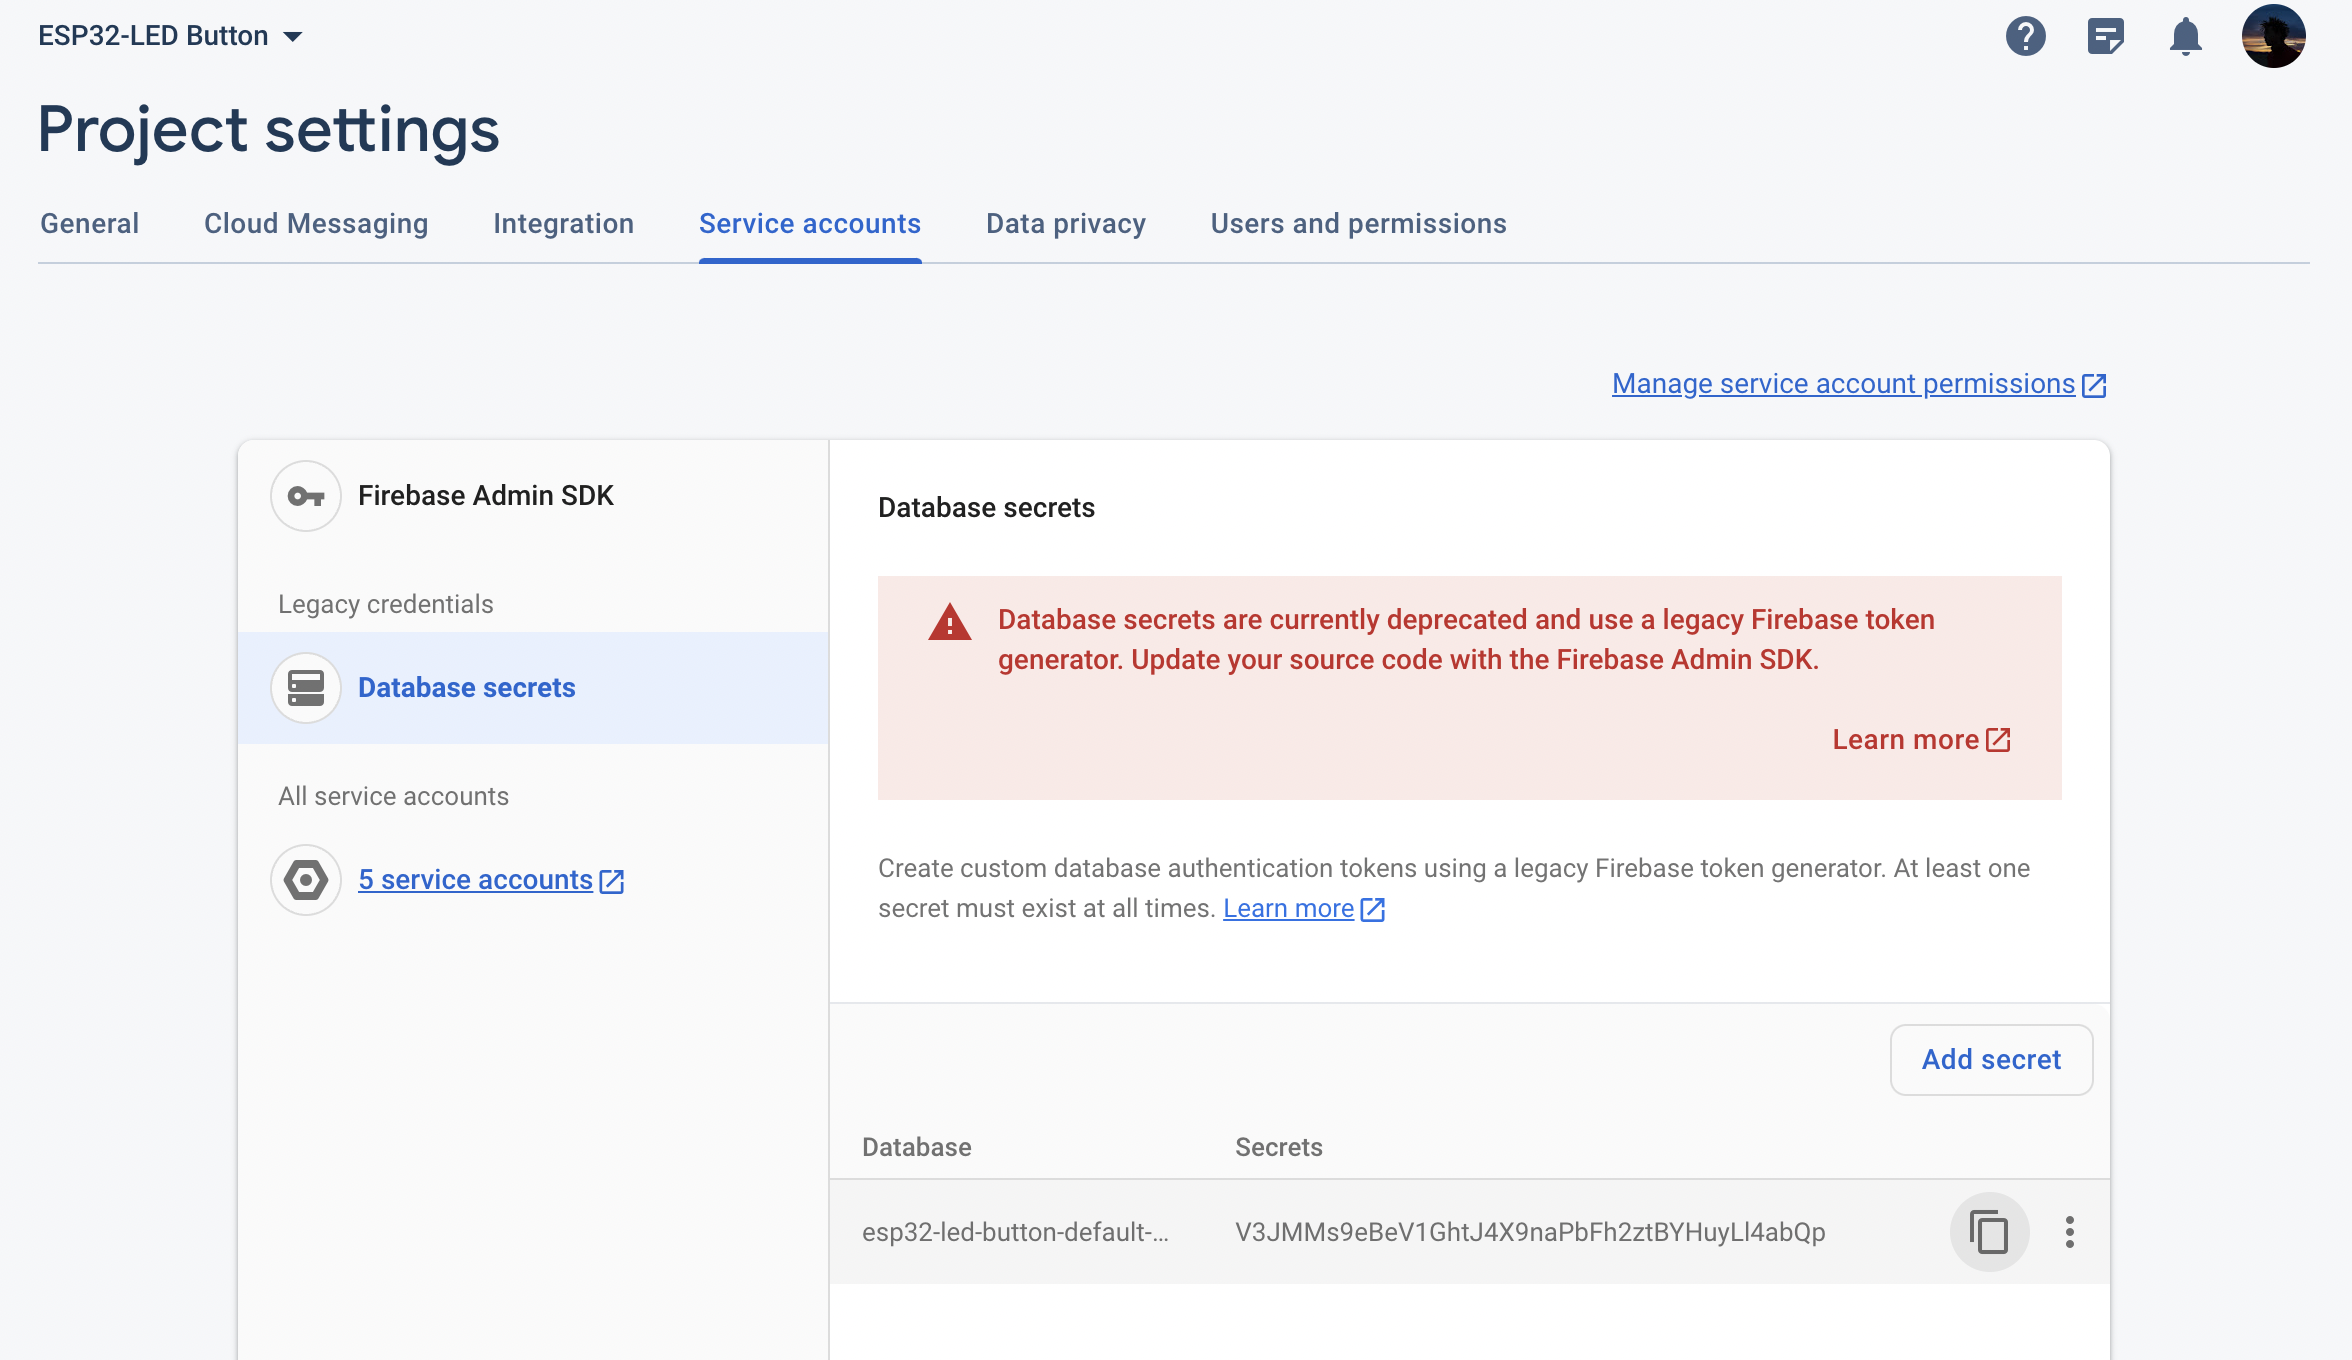
To establish secure access, we generated a secret key, and with the Firebase URL and secret key, our ESP32 board can communicate with the Firebase Realtime Database. This setup enables us to remotely control the LED connected to the ESP32 board by updating the LED status in the Firebase console from anywhere with internet access.
B) Circuit Assembly
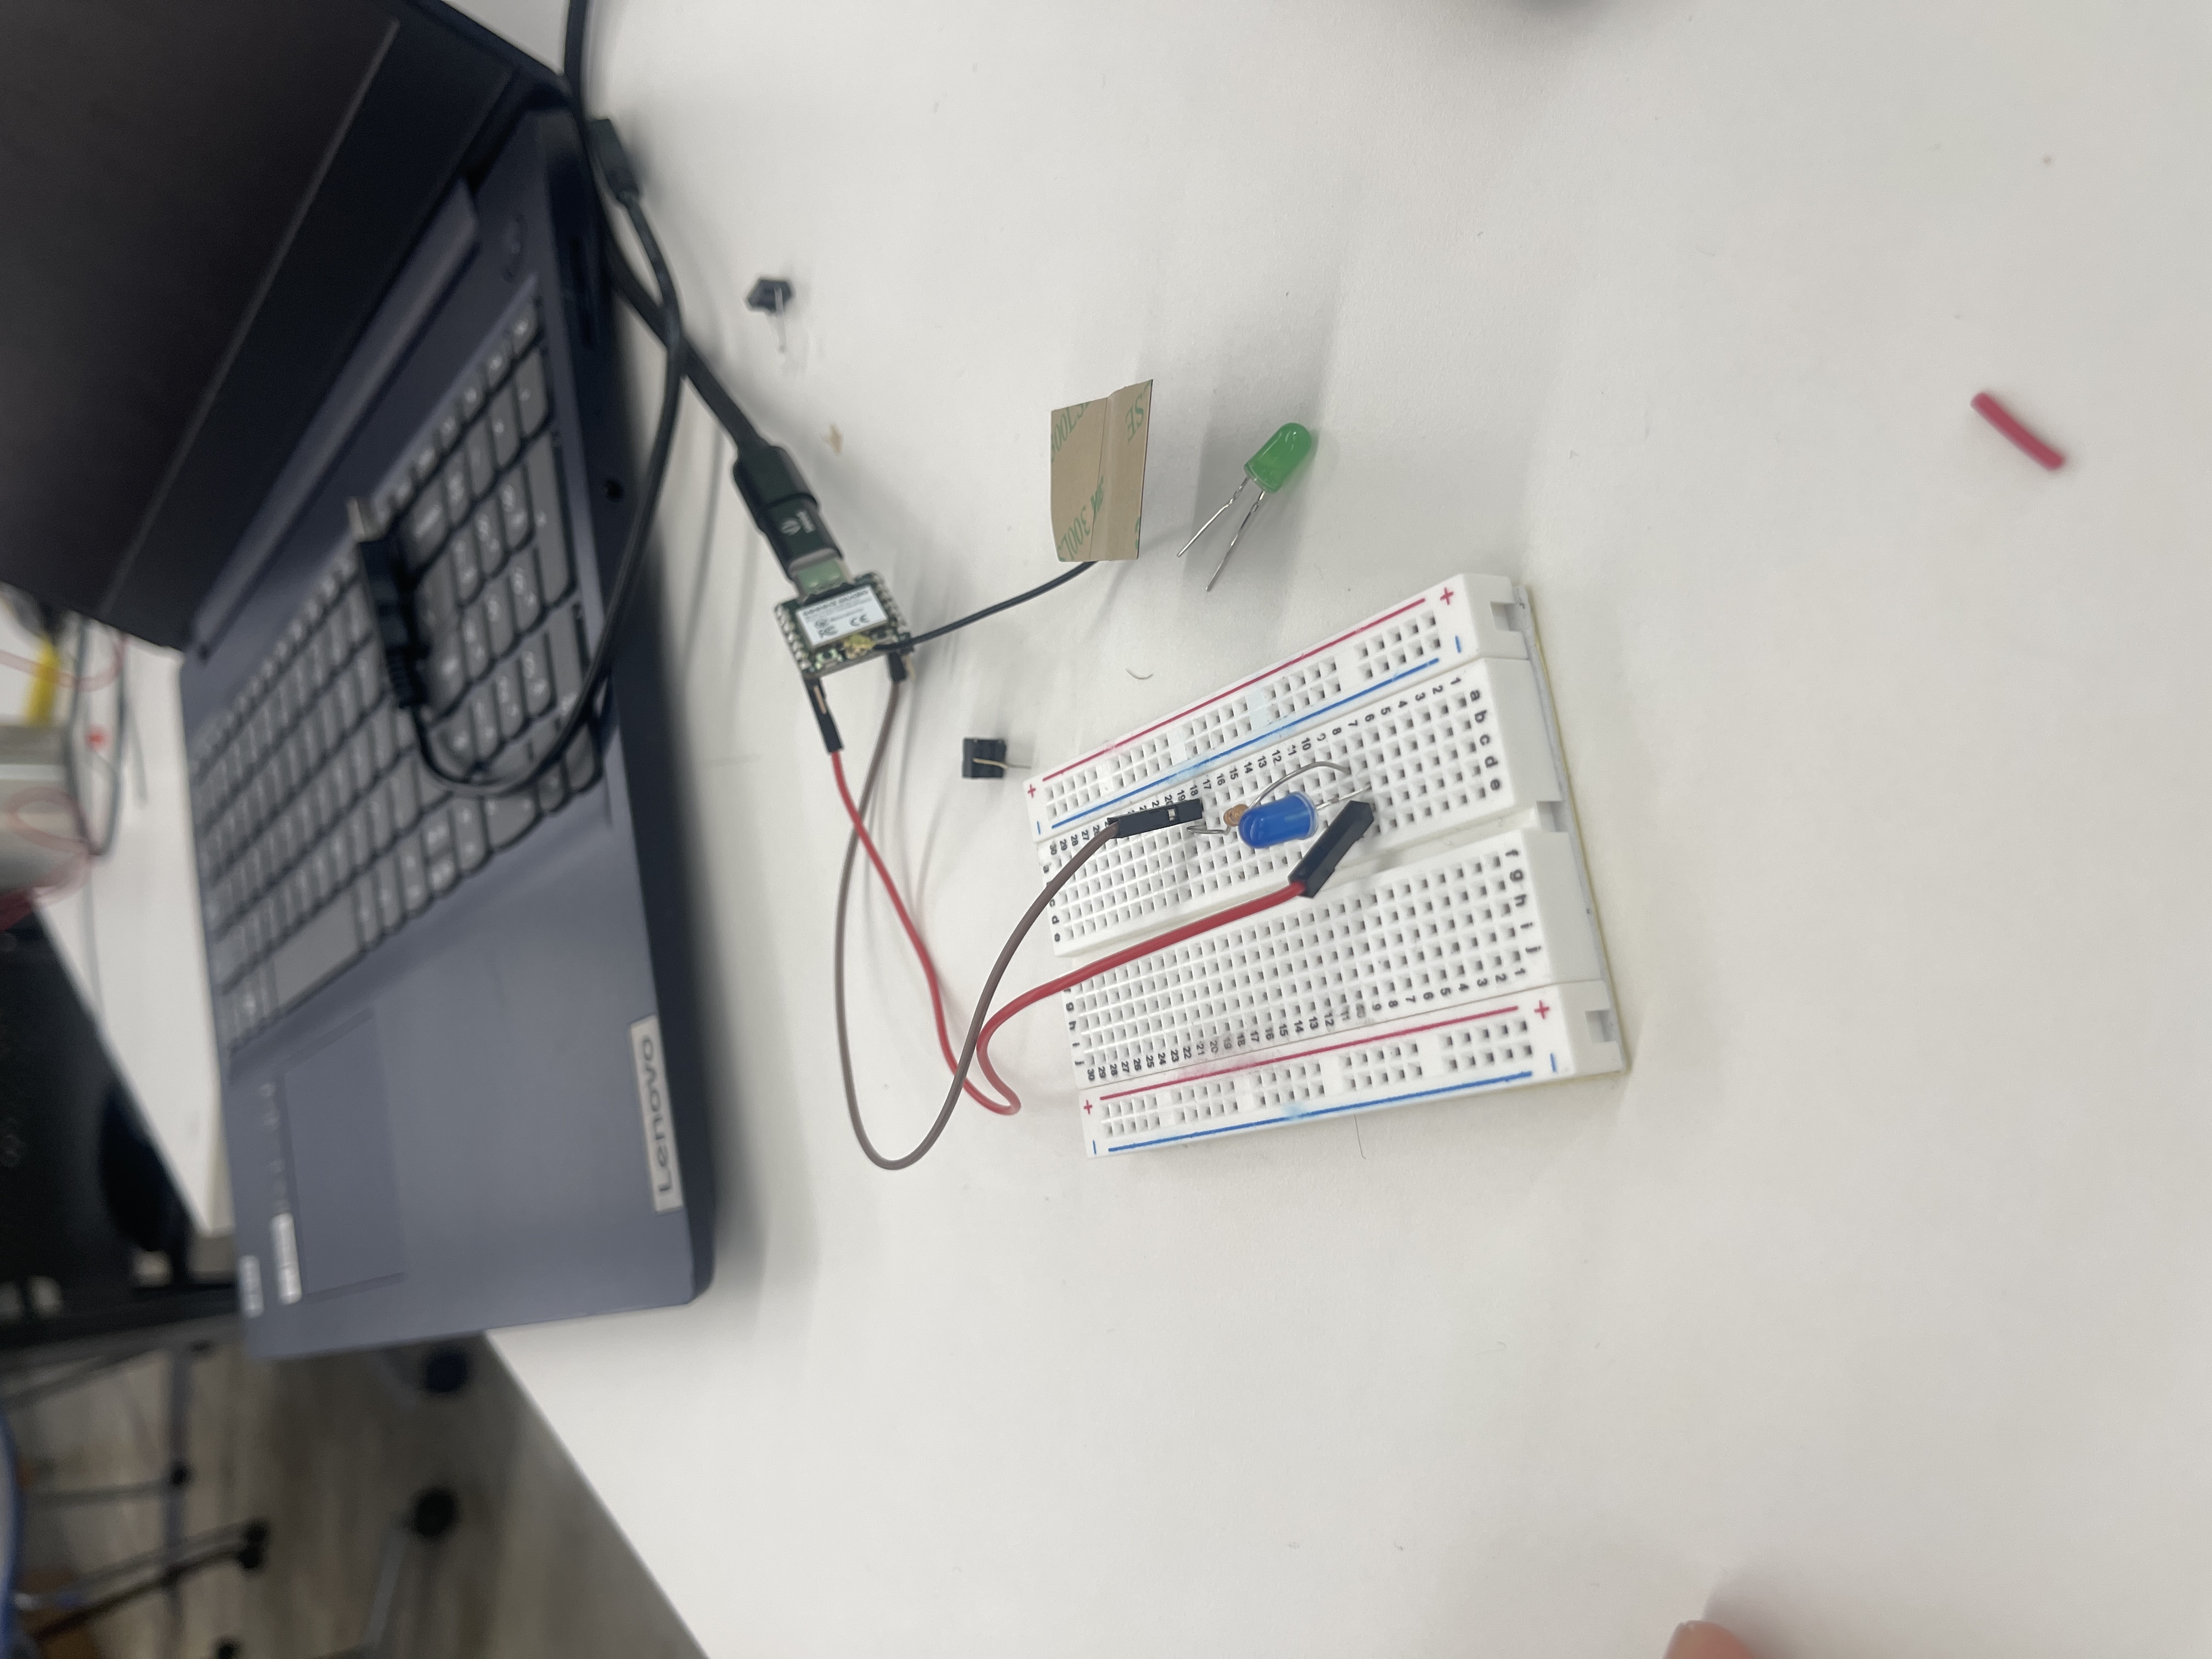
After completing the Google Firebase setup, we needed to assemble our circuit. The circuit consists of several components, including the ESP32C3 Xiao board, a breadboard, an LED, and a resistor. Below is a picture of our circuit setup:
C) Implement Program into ESP32
After finishing the circuit, we implemented a program that allows us to remotely control the LED light within the circuit through Google Firebase. The program defines the Firebase, and WIFI credentials, and essentially connects the ESP32 Xiao board to our Wi-Fi network and Firebase database. Below is the code that I implemented into the ESP32 Xiao:
    #include <WiFi.h>                                 // esp32 library
    #include <FirebaseESP32.h>                        // firebase library

    #define FIREBASE_HOST "https://esp32-led-button-default-rtdb.firebaseio.com/"  // the project name address from firebase id
    #define FIREBASE_AUTH "V3JMMs9eBeV1GhtJ4X9naPbFh2ztBYHuyLl4abQp"                // the secret key generated from firebase
    #define WIFI_SSID "MAKERSPACE"                     // input your home or public wifi name
    #define WIFI_PASSWORD "12345678"                  // password of wifi ssid

    String fireString = "";                            // led status received from firebase
    int ledpin = 5;

    //Define FirebaseESP32 data object
    FirebaseData firebaseData;

    void setup() {
      Serial.begin(115200);
      delay(1000);
      pinMode(ledpin, OUTPUT);
      WiFi.begin(WIFI_SSID, WIFI_PASSWORD);            // try to connect with wifi

      Serial.print("Connecting to ");
      Serial.print(WIFI_SSID);
      while (WiFi.status() != WL_CONNECTED) {
        Serial.print(".");
        delay(500);
      }

      Serial.println();
      Serial.print("Connected to ");
      Serial.println(WIFI_SSID);
      Serial.print("IP Address is : ");
      Serial.println(WiFi.localIP());                  // print local IP address
      Firebase.begin(FIREBASE_HOST, FIREBASE_AUTH);    // connect to firebase
      Firebase.reconnectWiFi(true);
      Firebase.set(firebaseData, "/LED_STATUS", "OFF");    // set initial string of "OFF"
    }

    void loop() {

      Firebase.get(firebaseData, "/LED_STATUS");         // get led status input from firebase
      fireString = firebaseData.stringData();            // change to e.g. intData() or boolData()
      Serial.println(fireString);

      if (fireString == "ON") {                    // compare the input of led status received from firebase
        Serial.println("Led Turned ON");
        digitalWrite(ledpin, HIGH);                // make output led ON
      }

      else if (fireString == "OFF") {              // compare the input of led status received from firebase
        Serial.println("Led Turned OFF");
        digitalWrite(ledpin, LOW);                 // make output led OFF
      }

      else {
        Serial.println("Please send ON/OFF");
      }

      delay(1000);                                 // not strictly necessary
Within this program, the setup() function initalizes communication and sets up the LED pin as an output. The micro-controller then attempts to connect to the designated Wi-Fi network, displaying its status through the Serial Monitor on the Arduino application. After a successful connection between the microcontroller and the network, the program then connects the ESP32 to my Google Firebase Realtime Database via the given Firebase URL and key.
Furthermore, the loop() function continuously monitors the Firebase database for updates to the LED status. When receiving the LED status data from the Realtime Database at Google Firebase, the program stores this boolean value in the fireString variable. Based on the received status, the ESP32 board controls the LED, turning it on if the status is "ON," and turning it off if the status is "OFF."
Final Product:
After completing these three steps, we installed the program onto the ESP32 Xiao microcontroller, and tested the remote control through Google Firebase. Here is a video of it: